• Welcome to the ElgrandOC forum.

    You will find that the majority of the forum is locked, but do not worry. You can unlock more content by registering to the forum completely free. Sign up is automatic, does not require email confirmation and is instant. Feel free to browse through the sections to see what topics have been covered before you register.
    You can register for an account by CLICKING HERE

    Once you have registered, you will unlock more of the forum content. You will not unlock all of the content until you have reached 10 posts. This is to give you an opportunity to chat to existing members and help to integrate you into the forum community.
    We are a friendly and helpful community and there is a wealth of infomation contained within the forum. Please feel free to register, introduce yourself and get to know your fellow members.

    Feel free to look at the Frequently Asked Questions section, the Meets/Events section and the Competition Section without having to register.
    We look forward to getting to know you and help you with any questions or problemd you have with your Elgrand.

What have you done to your Elgrand today?

Hope you have a screen while getting showered :eek:🤣
🤣🤣🤣 well we have been stuck inside a tiny apartment with no garden and extra large windows so it’s been so hot! So let’s say we have been feeling abit claustrophobic 🤣🤣🤣🤣
 
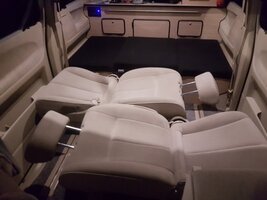
I spent Friday morning breaking up the white:
96014489_1145804389109921_716983621142970368_o.jpg


96102207_1145804369109923_7739745394850004992_o.jpg
 
The old girl passed her MOT yesterday..👍
No advisories either.
In the words of the MOT tester" its one heck of a machine"

Happy days.😁😁
always gives you a great feeling when they go straight through
The old girl passed her MOT yesterday..👍
No advisories either.
In the words of the MOT tester" its one heck of a machine"

Happy days.😁😁
gives you great feeling when they go straight through....
 
Took it for a spin, to go and price some outside repair jobs. (Hopefully ease back into some form of social distancing work over the coming weeks)
And then took advantage of Tesco' s 99p fuel 😁
 
The old girl passed her MOT yesterday..👍
No advisories either.
In the words of the MOT tester" its one heck of a machine"

Happy days.😁😁
Good stuff____thought you got a mot extension if mot was after March, due to covid etc (6 months ???)
 
Today I completed the gear select back lighting. My first attempt was to use a bright LED fitted in the standard bulb socket and bent at a jaunty angle to get as much light into the diffuser as possible, but this ended up just as pathetic as the original bulb.

DSC_0014.JPG

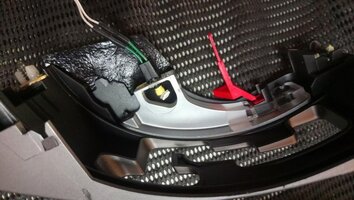
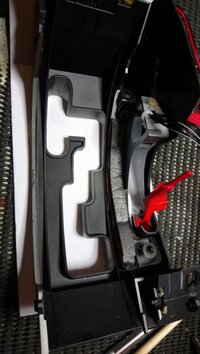
So I decided to light up the symbols from directly behind which involved removing a bit of paint from the diffuser to the rear of the N and D. The P and R have no paint. Then I wired up some SMD LED's to test the theory and these were a marked improvement when place directly on the diffuser.

The pics below show how they are wired.

DSC_3248.JPG
DSC_3249.JPG

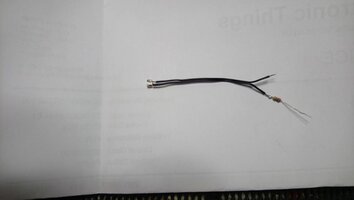
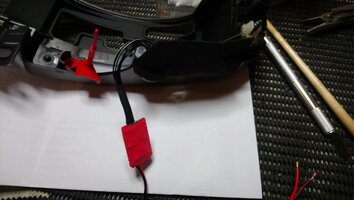
The next stage was to wire four LED's to a section of veroboard with the relevant bias resistors fitted. I shrink wrapped the board for protection.
DSC_3252.JPG

To fix the LED's in place on the diffuser I didn't want to use a glue of any type as this is rather experimental and some LED's have a habit of failing fairly quickly, so I came up with the idea of using a length of very sticky insulation strip which happened to be the exact width I needed, and I carefully laid them up in position.

DSC_3253.JPG

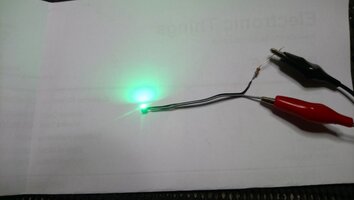
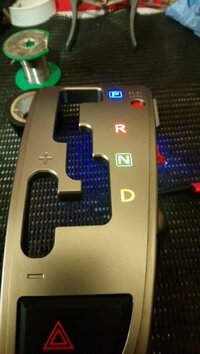
Then a final test before refitting.

DSC_3254.JPG

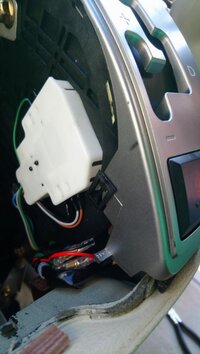
It was then just a matter of fitting a couple of bullet connectors to the wiring and putting it all back together.

DSC_0024.JPG

Hopefully the LED's will not fail too quickly as it's a bit of a faff removing it all. Time will tell.
 
Today I completed the gear select back lighting. My first attempt was to use a bright LED fitted in the standard bulb socket and bent at a jaunty angle to get as much light into the diffuser as possible, but this ended up just as pathetic as the original bulb.

View attachment 34028

So I decided to light up the symbols from directly behind which involved removing a bit of paint from the diffuser to the rear of the N and D. The P and R have no paint. Then I wired up some SMD LED's to test the theory and these were a marked improvement when place directly on the diffuser.

The pics below show how they are wired.

View attachment 34029
View attachment 34030

The next stage was to wire four LED's to a section of veroboard with the relevant bias resistors fitted. I shrink wrapped the board for protection.
View attachment 34031

To fix the LED's in place on the diffuser I didn't want to use a glue of any type as this is rather experimental and some LED's have a habit of failing fairly quickly, so I came up with the idea of using a length of very sticky insulation strip which happened to be the exact width I needed, and I carefully laid them up in position.

View attachment 34032

Then a final test before refitting.

View attachment 34033

It was then just a matter of fitting a couple of bullet connectors to the wiring and putting it all back together.

View attachment 34034

Hopefully the LED's will not fail too quickly as it's a bit of a faff removing it all. Time will tell.
Great job!! Well done 😁
 
Today I completed the gear select back lighting. My first attempt was to use a bright LED fitted in the standard bulb socket and bent at a jaunty angle to get as much light into the diffuser as possible, but this ended up just as pathetic as the original bulb.

View attachment 34028

So I decided to light up the symbols from directly behind which involved removing a bit of paint from the diffuser to the rear of the N and D. The P and R have no paint. Then I wired up some SMD LED's to test the theory and these were a marked improvement when place directly on the diffuser.

The pics below show how they are wired.

View attachment 34029
View attachment 34030

The next stage was to wire four LED's to a section of veroboard with the relevant bias resistors fitted. I shrink wrapped the board for protection.
View attachment 34031

To fix the LED's in place on the diffuser I didn't want to use a glue of any type as this is rather experimental and some LED's have a habit of failing fairly quickly, so I came up with the idea of using a length of very sticky insulation strip which happened to be the exact width I needed, and I carefully laid them up in position.

View attachment 34032

Then a final test before refitting.

View attachment 34033

It was then just a matter of fitting a couple of bullet connectors to the wiring and putting it all back together.

View attachment 34034

Hopefully the LED's will not fail too quickly as it's a bit of a faff removing it all. Time will tell.
Looks well cool. Great job mate.
 
Back
Top